Adding Beading To Old Kitchen Cabinets / 19 New Ideas for kitchen pantry addition counter tops ... - Learn how to properly install low voltage lights under cabinets in your home kitchen (video tutorial just over 4 minutes).
Adding Beading To Old Kitchen Cabinets / 19 New Ideas for kitchen pantry addition counter tops ... - Learn how to properly install low voltage lights under cabinets in your home kitchen (video tutorial just over 4 minutes).. Who knows what the difference is. You can apply either to the back of the beadboard or the front of the cabinets. Add beadboard paneling to cabinet sides after i attached the face frame, it had about a 3/4″ lip (overhang) on the outside edges of all the cabinet runs. Use a jigsaw to cut out the door center, then use a router to create a lip or ledge on the back of the door to hold the fabric. Remove your cabinet doors and place all hardware/screws in a ziploc baggy.
Next i added 1 x 6 to the bottom all the way around: The larger ornate ones can run over $50 per corbel but the regular size that is pictured in all these photos above only costs $9 a piece. A very simple and quick update is to add molding or trim to the cabinet doors. Adding trim to kitchen cabinets sometimes, the smallest and least expensive changes make the biggest impact. Shoot pin nails 3/8 inch.
Beadboard cabinet doors | Bookcase diy, Laundry mud room ... from i.pinimg.com Squeeze construction glue onto the back of the beadboard panels. Shoot pin nails 3/8 inch. For glass, you will need a silicone for glass as the one i purchased specified plastic. Be generous with the caulk and then press your beadboard onto it. Make any small adjustments as required (use a spirit level or ruler if needed), then tape each piece securely in position. Liquid nail is a great product because it's strong and will last. This way works well for me. This is not new information.
You can attach using short nails, but for doors that are thin, you want to use a strong adhesive.
I had painted all the oak doors creamy white prior to this. Squeeze construction glue onto the back of the beadboard panels. So the back of the island has corner pieces that are 3/4″ wider than what is seen on the sides. Add interest to a plain cabinet door by parading pretty trimwork around the door's perimeter. Adding trim to kitchen cabinets sometimes, the smallest and least expensive changes make the biggest impact. And i cut the wood! The great thing about caulk is that it will adhere to any (clean and dry) surface, so if you have old cabinets that are coated with a glossy finish, or your cabinets are plastic/melamine…caulk will stick to it! Adding decorative molding to basic cabinets is an easy & affordable way to make a big impact in your kitchen. For glass, you will need a silicone for glass as the one i purchased specified plastic. Drop the glass/plexi in place on top…. Liquid nail is a great product because it's strong and will last. Paint the cabinet, molding, and embellishments the same color. Place one piece of beadboard on each piece per your measurements.
First, we start with a plain 'ole stock cabinet from home depot. And i cut the wood! Use adhesive to attach the beadboard to the cabinet doors and drawers. Shoot pin nails 3/8 inch. Then, take a dry cloth and wipe both mdf trim pieces and cabinet door.
distressed white kitchen cabinets from s-media-cache-ak0.pinimg.com Squeeze construction glue onto the back of the beadboard panels. Move the beadboard to the left and right slightly so the adhesive spreads and works better. Who knows what the difference is. This way works well for me. Make any small adjustments as required (use a spirit level or ruler if needed), then tape each piece securely in position. Set up your doors on saw horses or somewhere easy to move around them on all sides. Lightly sand and paint the door. Cut a piece of beadboard using a circular or table saw to the dimensions of your door's inset panel.
I elevated it enough so that when i add the base molding, what is still seen will match the pieces i was about to add to the top.
Set up your doors on saw horses or somewhere easy to move around them on all sides. Who knows what the difference is. See more ideas about bead board cabinets, beadboard, home. Measure your cabinet door to determine how much molding you'll need. Add texture to your kitchen cabinets with fabric. Press the panel firmly to spread the glue. Mark where the crown molding will sit on the cabinet use a straight edge (such as a long level) to mark where the crown molding will sit on the cabinet facing. Ace hardware expert, mike jakubowski, walks us. Add a bead of silicone along the inside edge on the front side of the cabinet door: Add interest to a plain cabinet door by parading pretty trimwork around the door's perimeter. It goes, top, right, bottom, left. Use a jigsaw to cut out the door center, then use a router to create a lip or ledge on the back of the door to hold the fabric. Set the panels on the door and double check the level and plumb of the panel.
Regular old painters caulk will do, or whatever you have on hand. Add feet to cabinets using a few scraps of plywood, some screws and a bit of paint. I recommend at least 1 inch of space above the line to attach the molding. So i pulled out a drawer and marked on the trim how long the piece needed to be. Measure your cabinet door to determine how much molding you'll need.
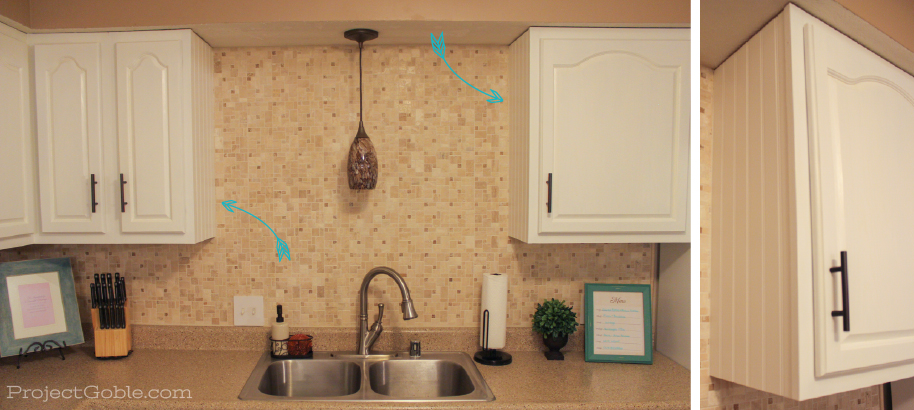
DIY Beadboard on our White (Painted) Kitchen Cabinets ... from projectgoble.com Paint the cabinet, molding, and embellishments the same color. Squeeze construction glue onto the back of the beadboard panels. Use adhesive to attach the beadboard to the cabinet doors and drawers. Drop the glass/plexi in place on top…. Who knows what the difference is. It goes, top, right, bottom, left. Sliding the beads into place, i held clamped scrap piece of wood on the front of the cabinet to make sure the bead sat flush against the front. Once the adhesive is applied, place the beadboard on the cabinet door and push down.
This blogger wanted to open up one cabinet for shelving and add trim and fresh paint to the rest of the cabinet doors.
Use a jigsaw to cut out the door center, then use a router to create a lip or ledge on the back of the door to hold the fabric. Cut the beadboard to fit inside the molding frame on each door face, adhering it in place with wood glue or construction adhesive. Be generous with the caulk and then press your beadboard onto it. Cut a piece of beadboard using a circular or table saw to the dimensions of your door's inset panel. So i laid each bead out in the same way on the top of the cabinets and applied the glue. Squeeze construction glue onto the back of the beadboard panels. You can apply either to the back of the beadboard or the front of the cabinets. Once the adhesive is applied, place the beadboard on the cabinet door and push down. Take the mdf trim pieces off the cabinet door and place them right next to the side they will be installed on, putting them front side down. Who knows what the difference is. I recommend at least 1 inch of space above the line to attach the molding. Make any small adjustments as required (use a spirit level or ruler if needed), then tape each piece securely in position. Add a bead of silicone along the inside edge on the front side of the cabinet door:


Posting Komentar
0 Komentar